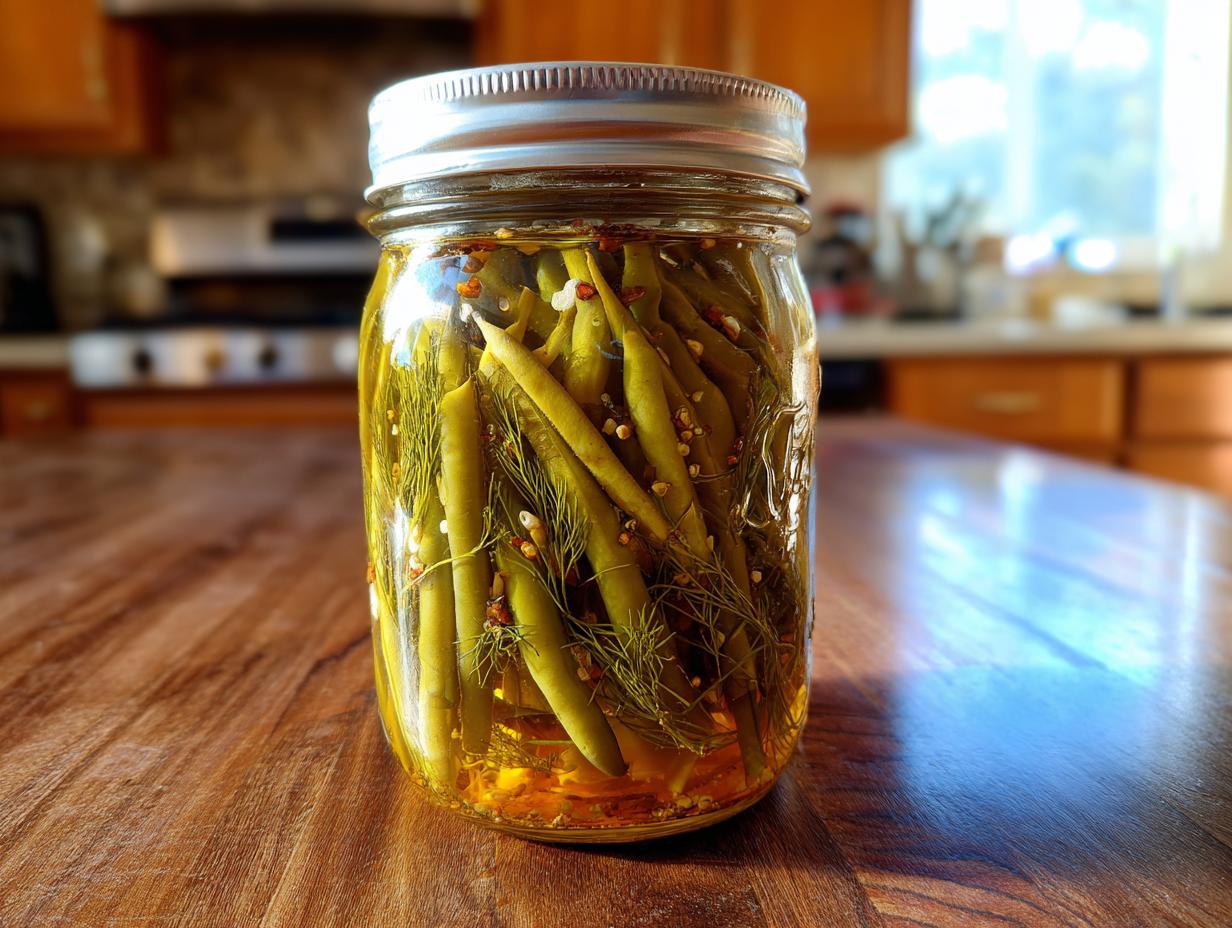
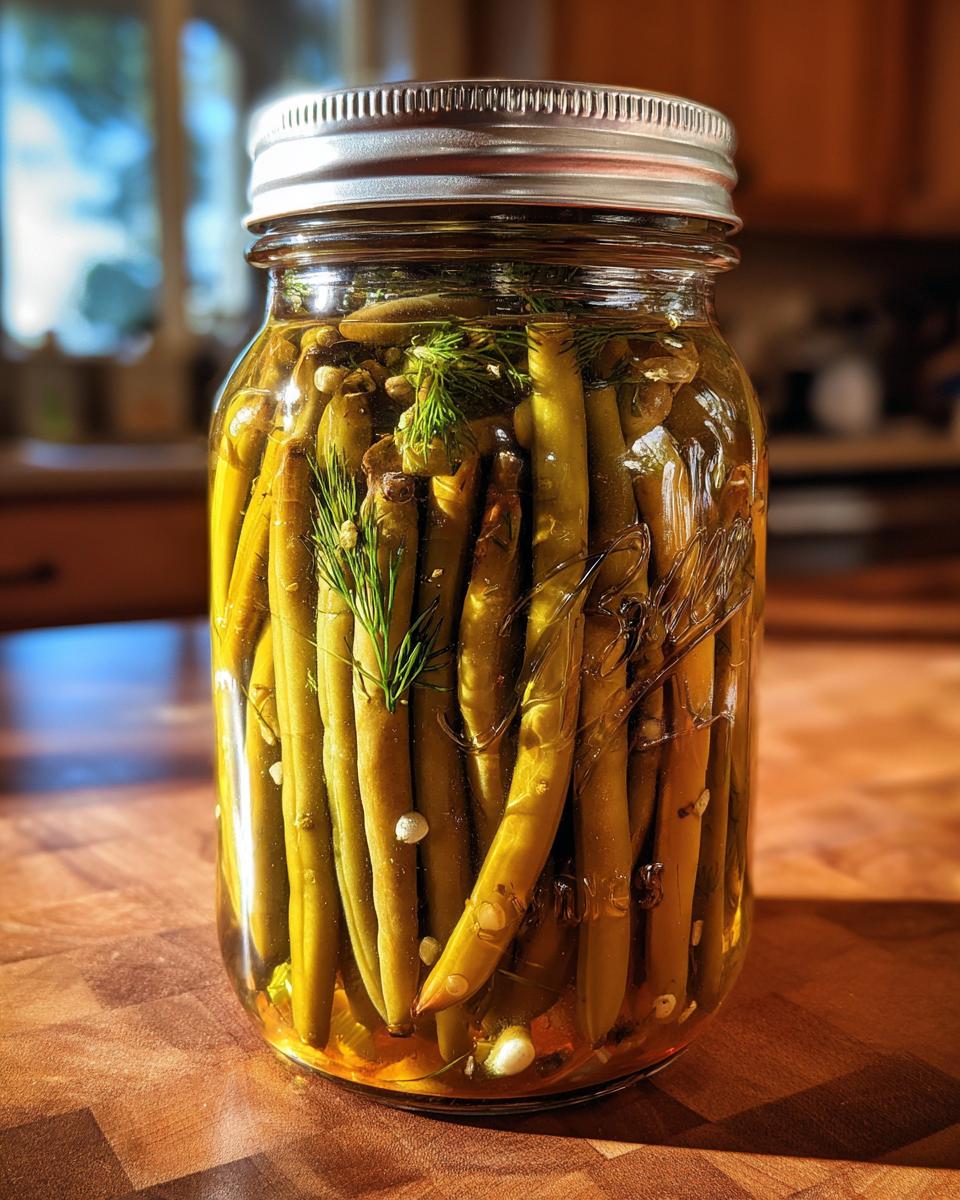
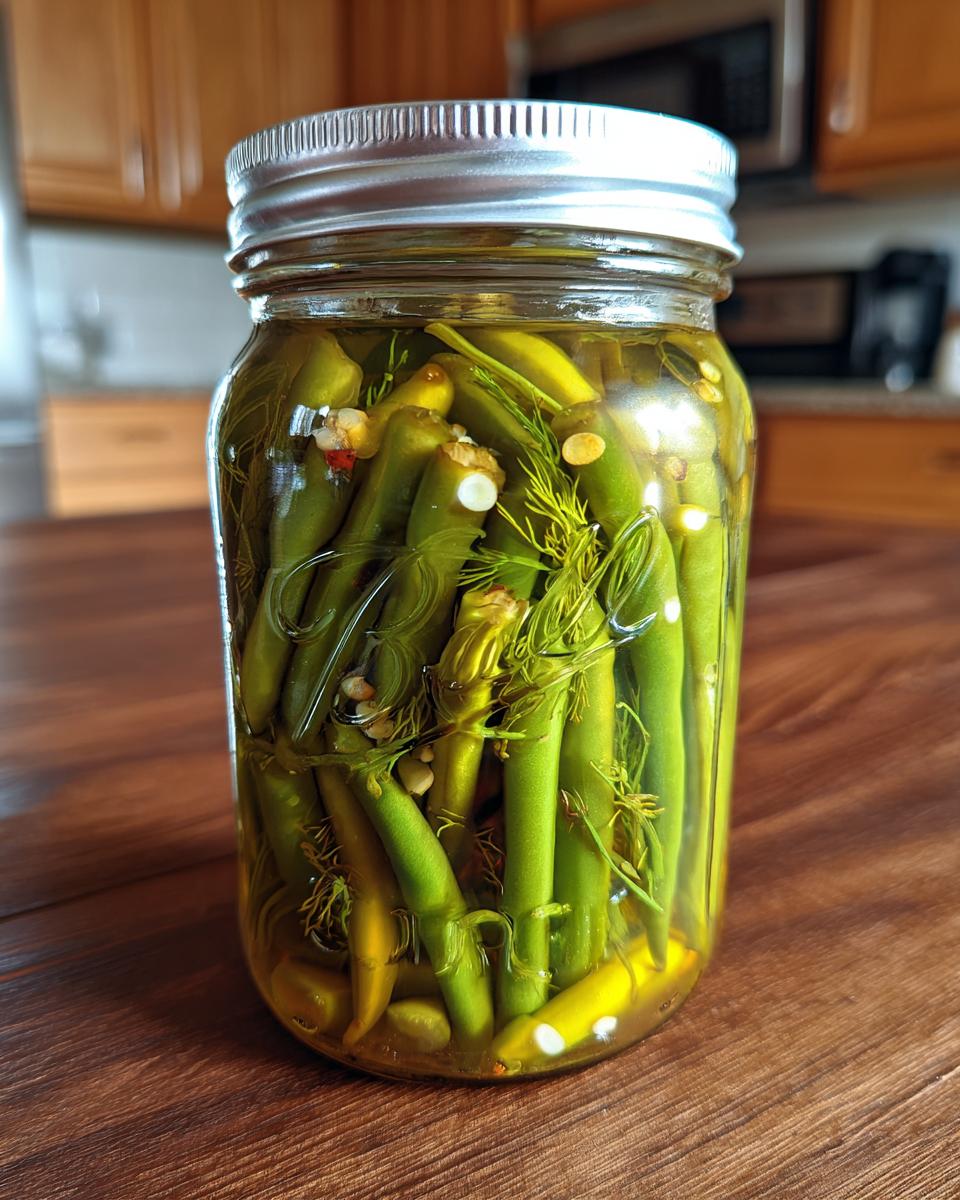
Okay, friends, let’s talk Pickled Dilly Beans! Have you ever had one? That perfect crunch, the tangy vinegar, the burst of dill… It’s like a party in your mouth, I swear! I first tried these years ago at a local farmer’s market. I was instantly hooked. Who knew a simple green bean could be so darn addictive?
I’ve been making my own version ever since, tweaking it here and there until I landed on what I think is the BEST Pickled Dilly Beans recipe EVER. And trust me, I’ve tried a LOT of recipes. I’ve been canning for years, and I’m obsessed with getting that perfect balance of flavor and crispness. This recipe? It’s a winner. I’ve even won blue ribbons at the county fair with it – seriously! So, you know you’re in good hands here, with someone who’s got the experience to guide you to dilly bean perfection!
Why You’ll Love These Pickled Dilly Beans
Quick and Easy Pickled Dilly Beans
Seriously, you won’t believe how FAST these come together! From start to finish, you’re looking at maybe half an hour? Perfect for when you need a quick snack or want to impress your friends with some homemade goodness, fast!
Tangy and Flavorful Pickled Dilly Beans
Oh. My. Goodness. The FLAVOR! That tangy vinegar, the salty brine, the fresh dill… and that CRUNCH! You just can’t beat it. Trust me, these are seriously addictive. You’ll be popping them straight from the jar!
Homemade Pickled Dilly Beans are Better
Okay, let’s be real: store-bought? Kinda mushy and bland. But HOMEMADE dilly beans? They’re bursting with flavor and have that perfect snap. Plus, you know EXACTLY what’s going into them. No weird preservatives or artificial stuff here!
Ingredients for Perfect Pickled Dilly Beans
Alright, let’s gather our goodies! Here’s what you’ll need for the most amazing Pickled Dilly Beans EVER. Don’t skimp on the quality, okay? Fresh is best! We’re talking about:
- 1 pound green beans, trimmed. (Make sure they’re nice and firm!)
- 3 cups white vinegar. (Plain ol’ white vinegar does the trick!)
- 1 cup water. (Tap water is fine!)
- 1/4 cup pickling salt. (Don’t use regular table salt, okay? Pickling salt is the key!)
- 4 cloves garlic, peeled. (I like ’em big and juicy!)
- 4 sprigs fresh dill. (Fresh dill is a MUST. Dried just won’t cut it!)
- 1 teaspoon red pepper flakes (optional). (For a little KICK!)
- 1 teaspoon mustard seeds (optional). (Adds a nice little something-something!)
How to Make Pickled Dilly Beans: Step-by-Step Instructions
Okay, ready to get pickling? Don’t worry, it’s easier than you think! Just follow these steps, and you’ll be munching on delicious Pickled Dilly Beans in no time. The most important thing? Just have fun!
Preparing the Beans for Pickled Dilly Beans
First things first: let’s get those beans ready! Give them a good wash under cold water. Then, snap off the stem end – you know, that little pointy bit? Just pinch it off with your fingers. I usually trim the tail end, too, just to make them look pretty. Set ’em aside for now!
Making the Brine for Pickled Dilly Beans
Now, for the magic potion – the brine! Grab a saucepan and pour in your vinegar, water, and pickling salt. Give it a good stir, then crank up the heat to high. We want this to come to a rolling boil, so keep an eye on it. Once it’s boiling, reduce the heat just a tad to keep it simmering while we get the jars ready. That pickling salt NEEDS to dissolve completely, so don’t skip the stirring!
Jarring the Pickled Dilly Beans
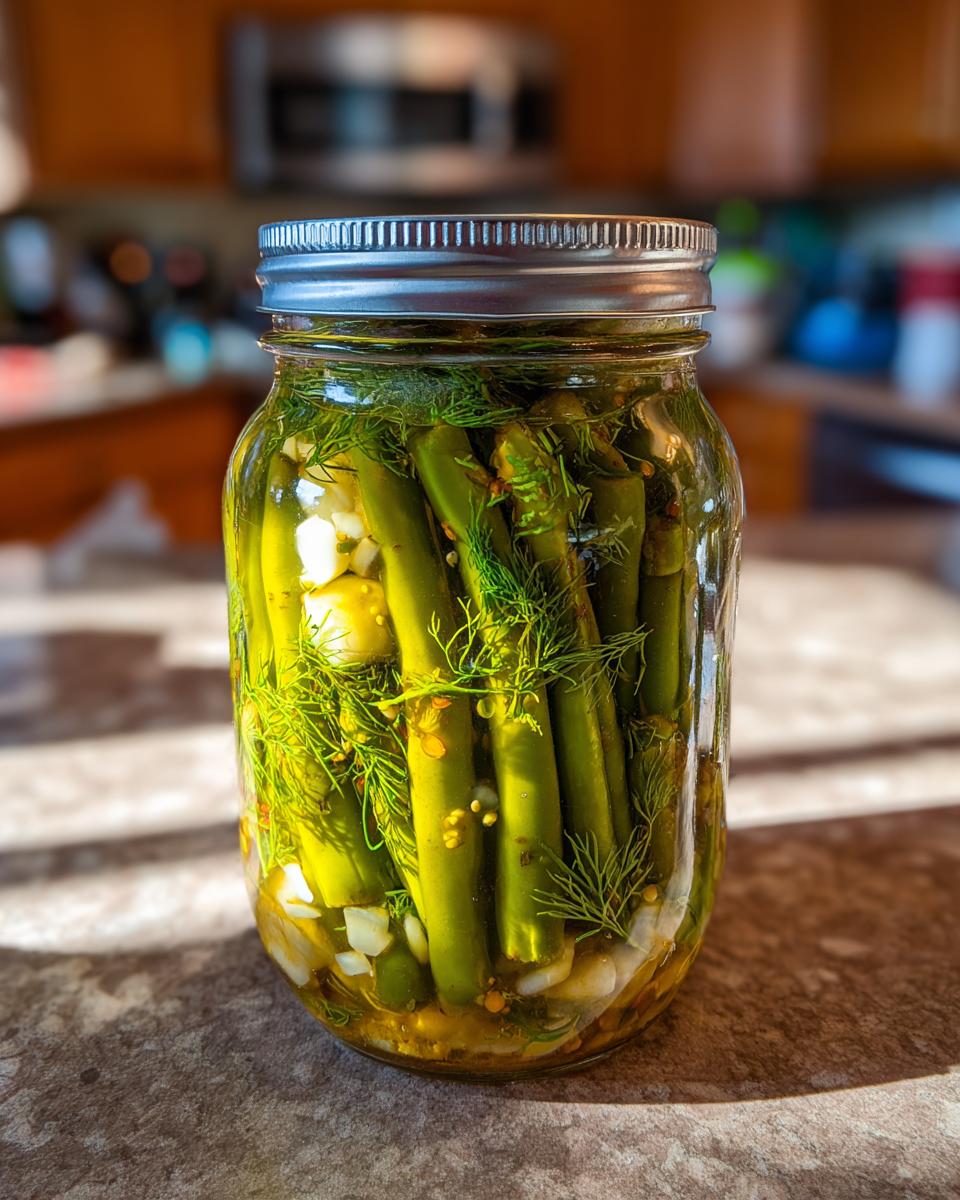
Okay, this is where things get fun! Make sure your jars are STERILE. I usually run mine through the dishwasher on the sanitize cycle. Now, grab your garlic cloves, dill sprigs, red pepper flakes (if you’re using them), and mustard seeds (if you’re using those, too!). Pop a clove of garlic, a sprig of dill, and a pinch of red pepper flakes/mustard seeds into each jar. Then, start packing in those green beans! Try to stand them up straight – it looks prettier that way! Leave about 1/2 inch of headspace at the top of the jar. Don’t squish ’em too tight, though; they need room to breathe!
Processing Pickled Dilly Beans in a Water Bath
Carefully pour that hot vinegar mixture over the beans in each jar, leaving that 1/2 inch headspace. Now, grab a bubble remover (or just a clean chopstick or spatula) and gently poke around in the jars to release any trapped air bubbles. Wipe the rims of the jars with a clean, damp cloth. Then, pop on your lids and screw on the bands until they’re fingertip tight – not too tight, not too loose! Lower the jars into a boiling water bath, making sure the water covers the tops of the jars by at least an inch. Bring the water back to a rolling boil, and process for EXACTLY 10 minutes. Set a timer! This is important for safety!
Cooling and Storing Your Pickled Dilly Beans
Carefully remove the jars from the water bath and place them on a towel-lined surface. Now, the hardest part: WAIT. Let them cool completely – about 12-24 hours. You should hear a “pop” as the jars seal. That’s music to my ears! Once they’re cool and sealed, store them in a cool, dark place for at least 2 weeks before eating. This gives the flavors time to meld together. Trust me, it’s worth the wait! If any jars don’t seal, just pop them in the fridge and eat them within a few weeks. Enjoy!
Tips for the Best Pickled Dilly Beans
Okay, wanna take your Pickled Dilly Beans from “good” to “OMG AMAZING”? Here are a few of my top-secret tips that I’ve learned over the years. Ready?
- Fresh Dill is a MUST: Seriously, don’t even THINK about using dried dill! Fresh dill makes ALL the difference.
- Don’t Overcook the Beans: We want them crisp, not mushy! So, keep an eye on them during the water bath. Ten minutes is the sweet spot!
- Make Sure Those Jars Seal: That “pop” sound is what we’re after! If a jar doesn’t seal, don’t panic! Just pop it in the fridge and enjoy those dilly beans within a few weeks.
Pickled Dilly Beans Variations
Okay, so you’ve nailed the classic Pickled Dilly Beans recipe? Awesome! Now, let’s get a little crazy and try some variations! That’s what cooking’s all about, right? Experimenting and making it your own! Here are a couple of my favorite ways to spice things up (literally!).
Spicy Pickled Dilly Beans
Want to add some serious heat? Oh, I’m your girl! Toss in a couple of sliced jalapenos along with the other goodies. Or, for even MORE kick, use a pinch of cayenne pepper in each jar. Trust me, these Spicy Pickled Dilly Beans are FIRE!
Different Herb Pickled Dilly Beans
Dill’s amazing, but why stop there? Try adding a sprig of fresh tarragon or oregano to each jar for a totally different flavor profile. Or, for a real surprise, add a few fresh basil leaves! Whoa! The possibilities are endless! Just make sure you’re using FRESH herbs, okay?
Frequently Asked Questions About Pickled Dilly Beans
How long do Pickled Dilly Beans last?
Okay, so you’ve made a bunch of these yummy Pickled Dilly Beans – awesome! Now, you’re probably wondering how long they’ll actually last, right? Well, if those jars are properly sealed (that “pop” is key!), they can hang out in your pantry for up to a YEAR! Seriously! But once you open a jar, you’ll want to stash it in the fridge and munch on those tangy beans within a few weeks. Good luck making them last that long, though – they’re seriously addictive!
Do I have to use pickling salt for Pickled Dilly Beans?
Okay, listen up, because this is important! Yes, YES, you absolutely need to use pickling salt for your Pickled Dilly Beans. I know, I know, you might be tempted to use regular table salt, but trust me, it’s not the same! Pickling salt is pure sodium chloride, without any of those extra additives like iodine or anti-caking agents that can make your brine cloudy and your beans taste… well, not so great. So, grab that pickling salt – it’s worth it!
Can I use different beans for Pickled Dilly Beans?
Okay, so you’re feeling adventurous, huh? I love it! While green beans are definitely the classic choice for Pickled Dilly Beans, you can totally experiment with other types of beans! Wax beans would work great, and even some firmer, stringless varieties might be fun to try. Just keep in mind that different beans might have slightly different textures and cooking times, so keep an eye on them during the water bath. And hey, if you try something totally wild and amazing, be sure to let me know!
Estimated Nutritional Information for Pickled Dilly Beans
Okay, so you’re curious about the nutritional deets, huh? Here’s a rough estimate for ya (keep in mind, it can vary!): About 30 calories, 0g fat, 1g protein, and 6g carbs per serving. Not bad for a tasty snack, right?
Enjoy Your Homemade Pickled Dilly Beans!
Okay, my friends, that’s it! You’ve officially made your own batch of amazing Pickled Dilly Beans! Now, the best part: ENJOY! Pop open a jar, share them with your friends, and prepare to be amazed. And hey, if you loved this recipe as much as I do, be sure to leave a comment below and give it a rating! Sharing is caring, right? And don’t forget to snap a pic and tag me on social media – I wanna see your dilly bean creations!
Print
Irresistible Pickled Dilly Beans: The Single Best Recipe
- Prep Time: 15 minutes
- Cook Time: 10 minutes
- Total Time: 25 minutes
- Yield: 4 pint jars 1x
- Category: Appetizer, Side Dish
- Method: Pickling
- Cuisine: American
- Diet: Vegan
Description
Crisp and tangy pickled dilly beans are a flavorful snack or side dish.
Ingredients
- 1 pound green beans, trimmed
- 3 cups white vinegar
- 1 cup water
- 1/4 cup pickling salt
- 4 cloves garlic, peeled
- 4 sprigs fresh dill
- 1 teaspoon red pepper flakes (optional)
- 1 teaspoon mustard seeds (optional)
Instructions
- Wash and trim green beans.
- Combine vinegar, water, and salt in a saucepan. Bring to a boil.
- Pack green beans, garlic, dill, red pepper flakes (if using), and mustard seeds (if using) into sterilized jars.
- Pour hot vinegar mixture over beans, leaving 1/2 inch headspace.
- Remove air bubbles and seal jars.
- Process in a boiling water bath for 10 minutes.
- Let cool completely before storing.
Notes
- Use sterilized jars and lids for proper sealing.
- Adjust red pepper flakes to your spice preference.
- Store in a cool, dark place for at least 2 weeks before eating.
Nutrition
- Serving Size: 1/4 jar
- Calories: 30
- Sugar: 1g
- Sodium: 500mg
- Fat: 0g
- Saturated Fat: 0g
- Unsaturated Fat: 0g
- Trans Fat: 0g
- Carbohydrates: 6g
- Fiber: 2g
- Protein: 1g
- Cholesterol: 0mg